This is a recipe I’ve developed as part of a paid partnership with Parmigiano Reggiano.

It’s only in recent years I’ve begun to throw myself into seasonal cookery as part of my plan to reclaim Christmas as something more my own, rather than focusing on all the aspects I don’t enjoy (see: the whole religious festival thing, the stress, tinsel). Obviously, the social side is fun, and it’s nice to have a break – even if I didn’t bloody choose to have one thankyouverymuch – but for me, it’s about trying to enjoy myself in non-traditional ways and not get annoyed with gaudy lights and forced participation.

I’ve chosen to buy a non-traditional tree, for example. I was always whining that I didn’t like the green pointy variety, so why did I ever consider buying one? Mine’s a willowy silver number covered with food-themed baubles and a crab on top instead of an angel. So there.

Please don’t for a moment think I am judgemental about the ways in which others enjoy Christmas because nothing could be further from the truth. I think there is a lot of pressure at this time of year to do things a certain way, and what I’m trying to say is that it’s helped me a lot to find my own path.

Food can become oddly competitive too, which is a shame because it’s arguably the best thing about Christmas {insert caveat about family time here}. Over the years I’ve developed some recipes which have become firm favourites (these sausage rolls with whisky caramelised onions for example) and some which are popular newcomers (looking at you, Brussels sprout kimchi).

I think one thing we can all agree on is that it’s necessary to ensure a steady stream of snackage, and these croquettes are a perfect little bite. They’re just mashed potato, bacon, Brussels and plenty of Parmigiano Reggiano made into balls and deep-fried, and you could easily swap in some leftover ham or other greens if you felt like it.

The Parmigiano Reggiano brings moreish savouriness and depth of flavour, plus it’s very handy to have around at this time of year – try grating it onto puff pastry and twisting into straws before baking for the easiest last-minute party snack for example, or use as a filling for palmiers with anchovy. It would be great in some miniature tartlets with crab as a smart starter, or try adding to stuffing for a savoury note that will keep people guessing.

The most important thing is not to stress, and I think one of the nicest ways of hosting at Christmas is to invite people round, tell them to bring their own bottles, make a big pile of literally just one snack and have them dig in. These are cute and filling enough to keep everyone satisfied and you don’t have to faff about with multiple tasks. They work nicely with a quick n’ dirty dip made with mayonnaise, a touch of yoghurt, chives, garlic and more Parmigiano Reggiano. Dive in, kick back and try not to worry about what on earth you’re going to buy that cranky old uncle you don’t particularly care for.

Parmigiano Reggiano, Bacon and Brussels Sprout Croquettes Recipe

Makes 25-30 croquettes, depending on size

700g potatoes for mashing such as Maris Piper
2 egg yolks, plus 2 whole eggs for coating
100g grated Parmigiano Reggiano
120g Brussels sprouts, stalks removed and finely shredded
240g bacon (8 thin rashers), large pieces of fat removed and finely diced
Flour, for coating
Breadcrumbs, for coating
Oil, for frying

Cook the potatoes in salted water, then mash them until very smooth.

Add the bacon to a hot, dry frying pan and cook until just beginning to crisp, then add the sprouts and stir well. Cook, stirring, just until the sprouts have softened.

Mix mashed potatoes, Parmigiano Reggiano, sprouts, bacon and some salt and pepper. Taste for seasoning, then add the yolks and mix well.

Roll into walnut-sized balls and chill for at least 2 hours.

When you’re ready to cook the croquettes, cover one plate with flour, another with beaten egg and another with breadcrumbs. Using one hand for dry ingredients and one for wet, coat each ball in flour, then egg, then crumb.

Heat oil for deep frying to 180C. Turn an oven on low (50C or thereabouts).

Cook the croquettes in batches of 4 or 5, turning often, until golden brown all over (2-3 minutes should do it).

Drain on kitchen paper and transfer to the oven to keep warm while you cook the rest.

For the dip, I just mixed few tablespoons of mayo with a couple of yoghurt, a squeeze of lemon, a clove of garlic and plenty of grated cheese. Garnish with a few chives and you’re all set.

I first came across hasselback potatoes on American food blogs, years ago now. Thing is, it’s actually a Scandinavian recipe named after the restaurant Hasselbacken in Stockholm where they were invented (I’d always thought it was something to do with their backs being all ‘hassled’ by cuts*). The keys to their success are firstly the cutting and roasting technique and secondly, the application of a serious amount of butter.

With creamy innards and lots of crisp edges on top, this recipe delivers pretty much everything you want from potatoes in one package. Like many cooks, I season mine heavily and slip garlic in between the slices but it’s fun to go a step further occasionally – here I’ve topped them with crumbled Stilton, bacon and chives.

It occurred to me that these would make fantastic party food so I’m sharing the recipe. It’s simple, almost impossibly delicious and looks festive to boot. Job done mate.

*Not really LOL.

Hasselback Potatoes with Garlic, Stilton and Bacon Recipe

12 King Edward potatoes
7 cloves garlic
50g butter
3 tablespoons olive oil
5 rashers back bacon
Chives
Stilton

Preheat the oven to 200C.

Cut slices 2mm apart 3/4 of the way through each potato.

Melt the butter with the olive oil. Place the potatoes in a roasting dish and push slices of garlic into the slits, making sure they are pushed right in, or they will burn. Pour the butter and oil mixture over the potatoes and add 100ml water to the dish. Turn the potatoes over to make sure they’re well coated. Season heavily with salt and pepper.

Bake for 1 hour 30 minutes, basting with butter every 10 to 15 minutes, or until they’re tender inside and golden and crisp on top. Don’t skip the basting.

During this time, grill or fry the bacon until very crisp, then chop finely. I then re-crisped mine in a pan.

Once cooked, serve sprinkled with the bacon bits, crumbles of blue cheese and snipped chives. You can also serve drizzled with more butter from the pan. Why not?

Broad Bean Salad

For a short period before heading off to university I went back to live with my parents. As a ‘mature student’ at 21 I’d already been living elsewhere for three years and so it was a major change, especially since I’d made a string of poor choices when choosing houses. One that immediately springs to mind is the place I shared with six young men. SIX.

Can you imagine how bad that was? Bathroom grime of unprecedented levels; a fridge no-one dared open; pints of red wine spilled on the carpet (actually, was that me?); broken windows; stinky boxers glued down everywhere and a neverending chorus of bodily functions. The house was filled with Man Fug so thick you could bang your head on it.

There were many benefits to moving home, then, including pleasures such as not waking up to remember that someone had projectiled in a helicopter motion in the front room (this happened, he sort of spun around as he was being sick therefore spraying all four walls and furniture with the contents of his stomach + 12 cans of Stella).

The kitchen was unusable because obviously no one ever cleaned it, so it was good to be back in the parents’ shiny, orderly, well-stocked kitchen, to have dinner cooked for me, to not fear food poisoning or have to decide whether it’s a better life choice to just throw a pan in the bin rather than bother trying to wash it.

One of the best things about being back, though, was Sunday lunch, and there’s a meal my mum used to cook which apparently she didn’t consider anything special but I absolutely loved, to the point where I still think about it now. It doesn’t sound fancy, and isn’t, but it has some of my favourite ingredients.

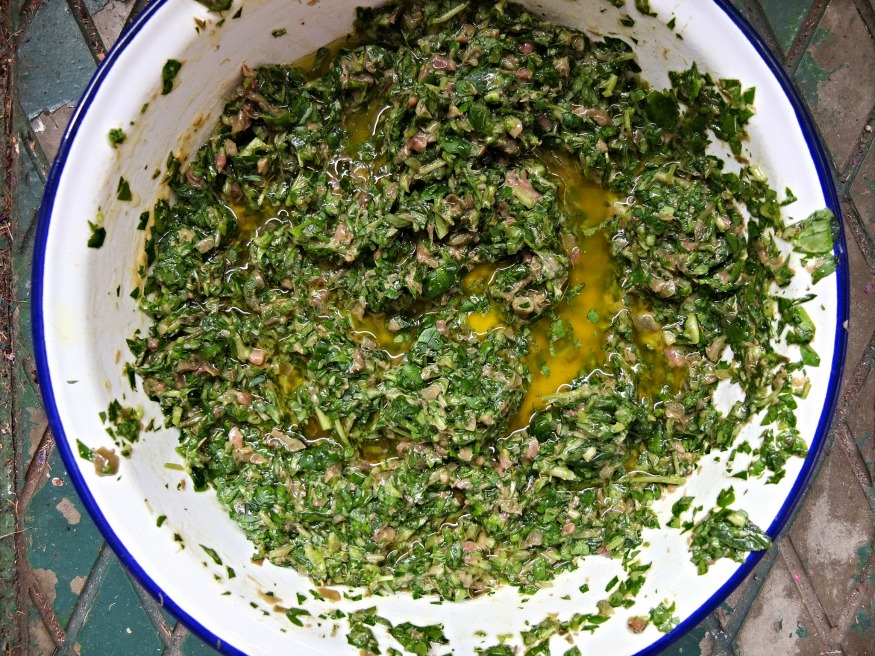
Salsa verde - put it on your potatoes.

There was a roast chicken, stuffed under the skin with a mixture of butter, herbs and lemon zest, new potatoes boiled and drenched in salsa verde and finally, a broad bean salad with crisp pancetta and a vinaigrette. The smell of the roasting chicken would fill the kitchen while Dad picked the broad beans from the garden.

We’d sit around the table and discuss important matters like whether or not Dad had won on the horse racing and which of my ex-boyfriends was really the worst. I’d pick lazily at the dish of remaining potatoes, scooping out the oily pools of salsa verde with my fingers.

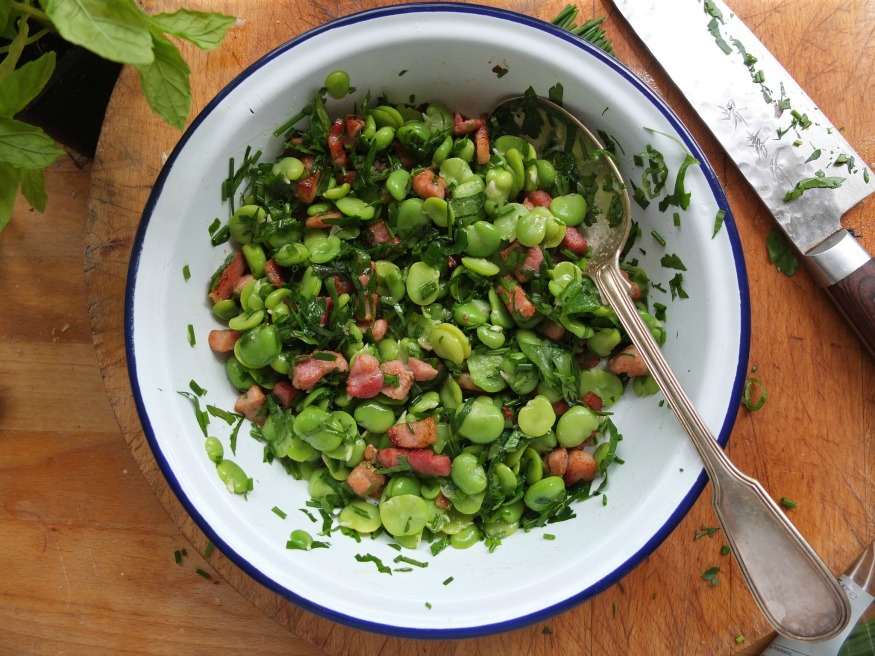
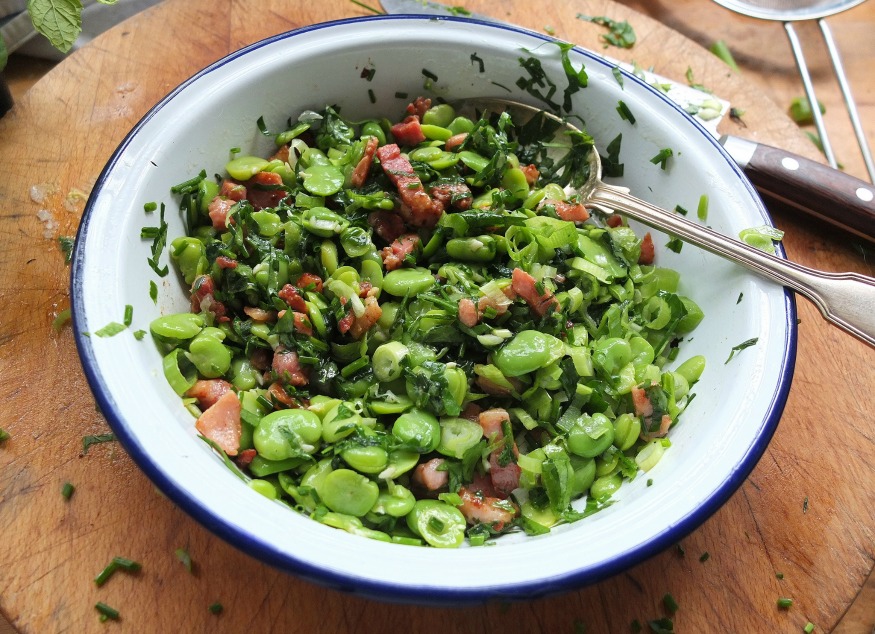
There was never any broad bean salad left. I think mum’s version was based on a Delia Smith recipe but I just make it with whatever combo of herbs, pork and onion I have around at the time. This recipe has lardons of bacon and a cider vinegar dressing and it’s a lovely salad to make whatever the age of the beans – even when they’re old and tough, the other ingredients are robust enough to handle it. I always think of the salad when the new season comes though, and so here we are today.

I haven't touched the colours on this photo. SO green!

Broad Bean Salad with Bacon, Herbs and Vinaigrette

1kg broad beans (un-podded weight)
80g bacon, cut into lardons
1 spring onion, green parts finely sliced
1 tablespoon each finely chopped chives, mint and parsley

For the dressing

1 clove garlic, crushed
1 teaspoon Dijon mustard
1 tablespoon cider vinegar
3 tablespoons olive oil
Salt and pepper

Remove the beans from their pods. Place in a saucepan with some water, bring to the boil, cook for 2 minutes, then drain. Place the beans in a bowl of cold water. Squeeze each bean from its tough skin (this is by no means necessary, it just means they’re extra tender and bright green).

Cook the bacon lardons until crisp and add to the beans with the herbs and spring onion.

Shake all dressing ingredients in a sealed jar until emulsified. Add a tablespoon of dressing to the salad and mix. You may want more, depending on how many broad beans you found inside your pods. Check seasoning and serve.

Sweetcorn and Kimchi Fritters

So brunch is a big thing, then. We’re not allowed to go out for breakfast any longer – we must brunch. The Australians are mad for it, with their avocados and endless cups of coffee. In America, they’ve long loved those stacks of impossible-to-finish pancakes dripping in syrup. Why a stack? One of those fluffy facecloths is enough. I had a shock the first time I saw a plate of those arrive, let me tell you, giving the waitress my best, ‘when will the other people be arriving?’ look. She didn’t care, it’s normal. They’re used to picking up the remains and chucking them straight in the bin.

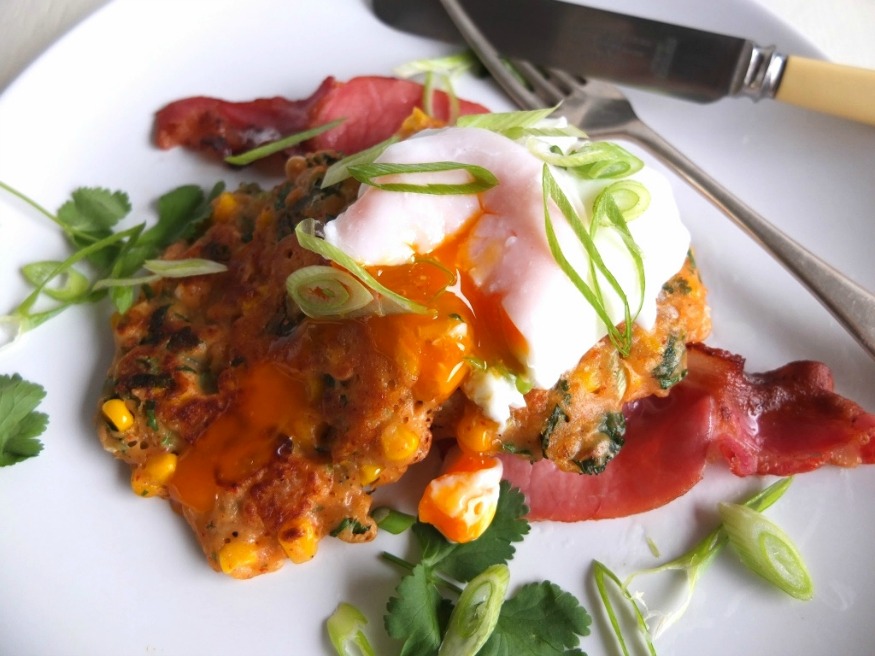
I feel a bit like this about brunch in general, it’s all just too much for the morning. Eggs, meat, bottomless booze and all of the rich things on one plate. Instead of setting you up for the day, this meal can easily send you back to bed. I like to draw the line at a single egg, a couple of bacon rashers and my new secret weapon – the corn and kimchi fritter. Corn fritters are obviously brilliant already (what with them containing corn and all), and kimchi goes really well with their sweetness, adding its own special funky punch of heat and crucially, acidity to lighten things. The drippy egg means it’s enough to fill you up, but not f*ck you up, because we all have stuff we’d like to do on a Saturday morning that doesn’t involve going back to bed, right?

Sweetcorn and Kimchi Fritters

Makes 12 fritters.

140g plain flour
1/2 teaspoon baking powder
220ml milk
3 spring onions, finely sliced (plus another to serve)
1 x 165g can sweetcorn (drained weight)
150g kimchi, roughly chopped
Small handful of coriander leaves, chopped
Oil, for frying

Bacon and eggs, to serve

Mix the flour and baking powder then whisk in the milk to make a smooth but thick batter. Add the other ingredients (saving 1 spring onion and a little coriander for garnish). Season with salt and pepper.

Heat some oil in a frying pan, a couple of tablespoons to start, you can add more as you go, and drop tablespoons of the mixture into the pan. Flatten them out and cook for a minute or so each side until golden. Set aside on kitchen paper while you cook the others.

Serve with grilled bacon and a poached egg. Scatter with the remaining spring onion and coriander to serve.

Why are seasonal sandwiches so rubbish? Last year, on a whim, I did a mad dash around Holborn collecting all the Christmas sandwiches from the major high street chains for a seasonal sandwich show down and it was just so depressing, I didn’t bother to repeat the experience this year. It got me thinking though, what exactly is it that’s so bad about most of them?

The main problem is the fact that they are generally stuffed with as many different elements of the Christmas dinner as possible. Why? The overall effect is a sandwich with a horrible generic taste that is unique to the time of year but not very pleasant. This is a sharp contrast to the sandwich made from your ACTUAL leftover Christmas dinner which is always truly bloody lovely, the reason being that it is made from nice ingredients that have been recently and properly cooked, which brings me nicely to my next point…

The ingredients in pre-prepped Christmas sandwiches are generally a bit gross. Who really eats turkey that often? More to the point though, who eats cheaply produced turkey that smells like farts and squeaks against your teeth? Who eats bacon that has been infused with a fake smoke flavour instead of actually smoked? Who eats sickly lurid red cranberry sauce that looks like it should be used to get really ingrained dirt off builders’ hands? PEOPLE WHO EAT CHRISTMAS SANDWICHES.

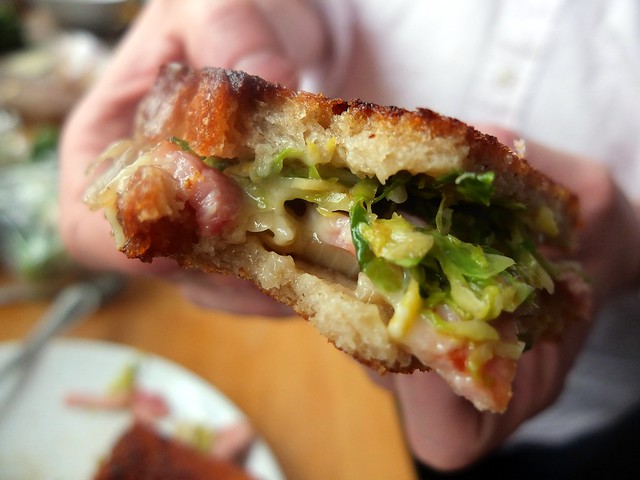
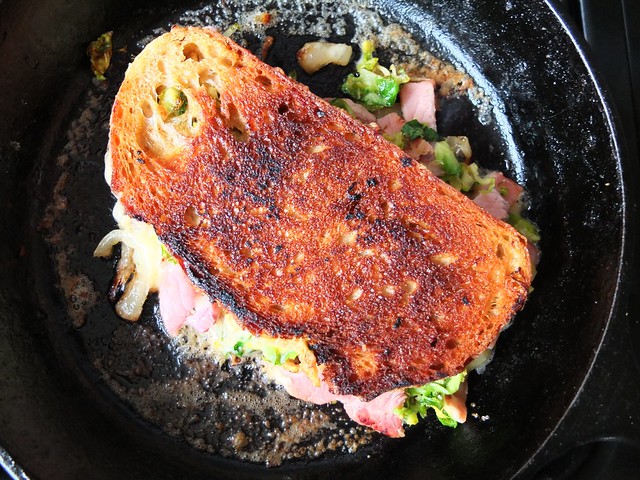
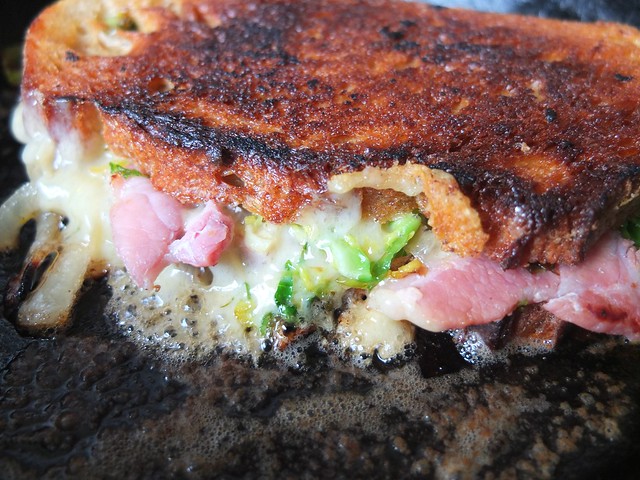
So anyway I thought I should have a bash at making a seasonal sandwich that actually tastes nice. It’s on sour dough, because there’s a lot of filling, and it needs to have some good sturdy scaffolding around the outside. Next, a layer of shredded sprouts, which I fried a little to get some colour on them, followed by a layer of proper, treacle cured, smoked bacon. I would have preferred streaky but smoked back I had so smoked back I used. The bacon is chopped before going into the sandwich, so it doesn’t come out in one long annoying strip when you try to eat it. Some good sharp cheddar next (I used Keen’s) followed by a layer of caramelised onions, which, despite being a bit 2001, bring much needed sweetness to the sandwich. A slick of wholegrain mustard and then, on the side, a pot of gravy (more of a stock really), made with partridge carcasses.

So it’s essentially a sort of festive toasted cheese sandwich French dip. Further proof that the toasted cheese is a sandwich which fits seamlessly into pretty much any situation.

Christmas Toasted Cheese Sandwich with Partridge Gravy

(this served 2. I know, I’ve changed)

2 slices sourdough bread
Several thick slices good quality cheddar cheese
1 onion, cut in half and sliced
A handful sprouts, finely sliced
3 slices back or 4 slices streaky smoked bacon (again, good quality)
Wholegrain mustard
Butter, for frying

For the gravy (you could of course use other bones or stock)

4 partridge carcasses
1 onion, halved
1 large carrot, roughly chopped
2 sticks celery, roughly chopped
A handful parsley stalks
A few peppercorns
Salt

To make the gravy, roast the carcasses and vegetables in a hot oven for about 30 minutes. Add to a stock pot with the other ingredients and cover with water. Simmer for a couple of hours. Skim off any scum from the surface. Strain and reduce a little further if desired.

For the sandwich, first caramelise in the onions very slowly, in butter. Stir them often but keep on the lowest heat. They will take about an hour. A splash of booze wouldn’t go amiss here come to think of it. Don’t forget to season them. In a frying pan, fry the sliced sprouts in a little oil over a fairly high heat, stirring all the time, until beginning to colour. When ready to assemble the sandwich, grill the bacon until the fat is crisp. On one piece of bread, add a layer of onions. Roughy chop the bacon and add it on top. Follow with a layer of the cheese, and then the sprouts. Cover the other piece of bread with mustard and put it on top.

In a heavy based frying pan or skillet, melt a generous amount of butter and add the sandwich. You don’t want the heat too high or it will burn but it should be sizzling. Take a heavy object (I used a Le Creuset pan and plonk it on top to weigh it down). After a couple of minutes (keep an eye on it), flip it over to toast the other side.

It’s National Sandwich week, so obviously I’m all over that like ketchup on a chip butty. Or brown sauce if you’re, you know, NORMAL.

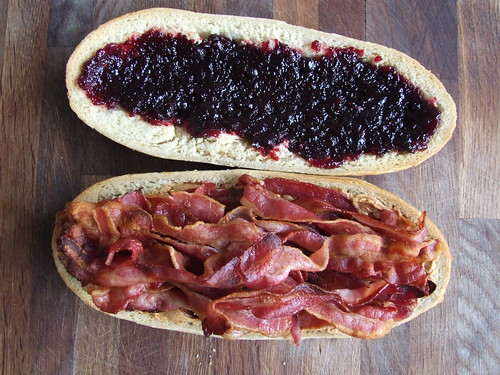
Anyway it seemed only right to honour the week with some sandwich bits and bobs so today I give you a recipe for what is a frankly outrageous piece of work – The Fool’s Gold Loaf. Made famous by Elvis ‘The King’ Presley, and taking its name from the reportedly stupendous price tag of $49.95. The story goes that Elvis would travel miles to eat this sandwich at the restaurant where it was invented, a joint called ‘The Colorado Mine Company’, in Denver. It’s said in fact that Elvis once flew his guests in from Memphis on his private jet just so they could eat it.

In true Elvis style this sandwich is a vision of excess – an entire loaf, hollowed out and filled with a jar (yes a jar) of peanut butter, followed by a jar (yes a jar) of grape jam, followed by a substantial amount (you get the idea) of crisp grilled bacon.

The combinations may sound odd, but the mixture of salty and sweet flavours isn’t that far out there; think bacon and maple syrup on waffles, or salted caramel ice cream. That said, I’ve never known a sandwich to elicit such a wide range of noises from people when eaten – a mixture of ‘mmm this is tasty’ plus ‘wow, this is wrong’ but ‘mmm this is tasty’; once you’ve had one bite, it’s  difficult to resist taking another.

This sandwich serves one, if you’ve the appetite of Elvis. It will serve approximately 8 ‘normal’ people however. Uh-huh.

Fool’s Gold Loaf

1 x approximately 11 x 4” white loaf
450g streaky bacon
250g smooth peanut butter
250g grape, blackcurrant, blueberry or plum jam
Butter, for spreading on the loaf

Preheat the oven to 150C.

Cut the loaf in half lengthways, leaving a little more thickness to the bottom half. Remove most of the crumb from the inside of each half, leaving a thickness of a couple of centimetres (or as much as you like). Spread each half with butter, inside and out.

Place the two halves on a baking tray and bake until toasted and lightly golden all
over (approx. 15 minutes).

While the bread is toasting, grill the bacon until crisp.

Spread the bottom half of the loaf with the peanut butter, then layer on the bacon. Spread the top half with the jam and sandwich together. Cut into slices to serve.

5926105625_0b6a3ac749

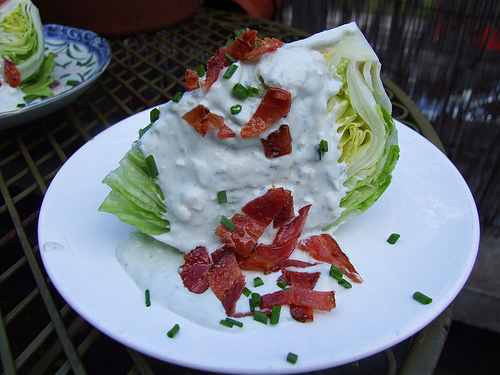
I just love how the Americans cut a big wedge of iceberg, drench it in blue cheese dressing and then call it a salad. Respect.

I’m rather fond of the poor old iceberg. It doesn’t have any flavour to speak of but as a big ol’ wedge of crunch, no lettuce does it better. So, you take a quarter of the lettuce and drench it; yes, drench it, in a blue cheese and sour cream dressing. Dribble. You’ll need something to offset all that richness and tang though, so why not sprinkle on a handful of sweet ‘n salty pig-candy pieces? Oh yes indeedy. Picture this: kerrrunch down through that wedge; creamy, salty; nuggets of blue cheese sneaking into every layer but then, hang on what’s this? Chewy shards of sticky, streaky candied bacon, that’s what. Salad garnish crack.

Caramelised walnuts would make a lovely alternative to the bacon but I wasn’t allowed to make those because that would have taken up time I could have been using to make more candied bacon.

Wedge Salad with Blue Cheese Dressing and Candied Bacon

(serves 4)

1 iceberg lettuce (try to get a nice round one so your wedges look good)

150g blue cheese (I used Roquefort)
100ml sour cream
100ml natural yoghurt
1 clove garlic, crushed
1 tablespoon lemon juice (plus extra just in case; I found I wanted a little more)
1 tablespoon chives, snipped with scissors

For the candied bacon

8 rashers streaky bacon
1-2 teaspoons of sugar per bacon rasher, depending on size

First candy the bacon by laying the rashers out on a baking tray and sprinkling the sugar evenly over them. Whack them under a hot grill until crisp and caramelised. Wipe the rashers around in the stick juices that have accumulated in the tray, turn them over and cook the other side. Watch them like a hawk once you’ve turned them as they will caramelise extremely fast. Once cooked, remove and let cool on a wire rack. Don’t let the pieces touch each other as they will stick together.

Crush the garlic with a teeny pinch of salt in a pestle and mortar until creamy. Blend the garlic with all the other dressing ingredients together in a bowl. You can do this with a blender if you like but I like my blue cheese dressing quite chunky so I mash it in a bowl to achieve the right consistency; it’s nice to get the odd nugget of cheese. Taste and add salt and pepper if you like; the cheese will already be quite salty. Taste again and add a little more lemon juice if you think it needs it.

Remove any manky outer leaves from your iceberg and quarter it. Wash it. Arrange each wedge on a plate, dollop on the blue cheese dressing. Cut the bacon into pieces and sprinkle over. Serve.

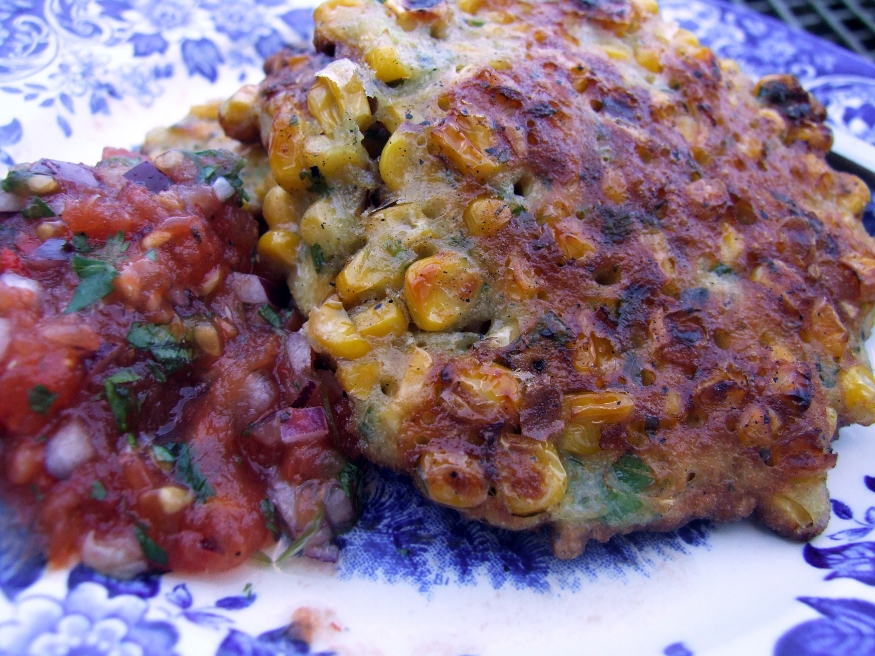
Corn Fritters

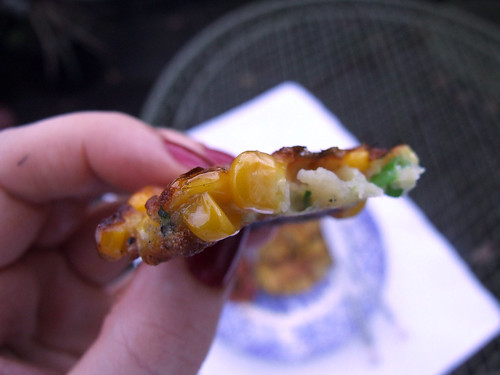
I usually serve these with bacon. It’s sweet n salty amazing. This scotch bonnet salsa is also lovely, but there’s a clear lack of pork in the picture and for that I apologise.

Corn is dirt cheap right now and I constantly hear it begging me to shear it from the cob and fritter the living daylights out of it. The fresh stuff really keeps its succulence but canned and frozen will also work. There are all sorts of things you could add to the mix; Simon suggested cockles, which I’m dying to try. Salt fish is a favourite, if a little more effort. Often though I prefer a simple recipe – a touch of spice, a little spring onion and fresh herbs; it’s all about the corn.

Fiona Beckett asked me to contribute a recipe to her student cooking site, Beyond Baked Beans and so this is it. The recipe is easy, fun to make and when served with bacon and perhaps an egg, one of the best hangover cures known to woman. What more could a student want from a meal? If you can stomach it though, there’s no better accompaniment than an ice cold beer.

Corn Fritters

140g plain flour
1/4 teaspoon baking powder
1 egg, lightly beaten with a fork
220ml milk
3 large corn cobs
1 teaspoon ground cumin
1 teaspoon ground coriander
3 spring onions, finely sliced
A small handful of fresh herbs, such as mint, coriander or parsley
If you’re not serving this with a hot sauce, try adding a finely chopped red chilli in the batter
Salt and pepper

Vegetable or groundnut oil, for frying

Sift the flour into a large bowl with the baking powder. Pour in the milk and mix well to make a smooth batter.

Remove any outer papery husk and strings from the corn cobs then stand one on its end on a chopping board and carefully run your knife down one side to remove the kernels. Repeat this until all the kernels are stripped off and then add them to the batter. Add the egg, spices and spring onion and season with two large pinches each of salt and pepper.

Heat a 1cm depth of oil in a heavy based frying pan or skillet and wait until it starts shimmering, but not smoking. Turn the heat to medium-high. Drop a tablespoon of the batter into the oil at a time and immediately flatten it out into a round fritter shape. It will take a few minutes to turn golden on the underneath – you can then flip it over and brown the other side. Be wary as the oil will spit a little and splash as you turn them. Set aside to drain of excess oil on kitchen paper then keep warm in an oven on its lowest setting while you make the rest. Don’t be tempted to try and put too many in the pan at once.

Serve with bacon. And perhaps egg. Or anything else you fancy.

Savoy Slaw with Bacon and Walnuts

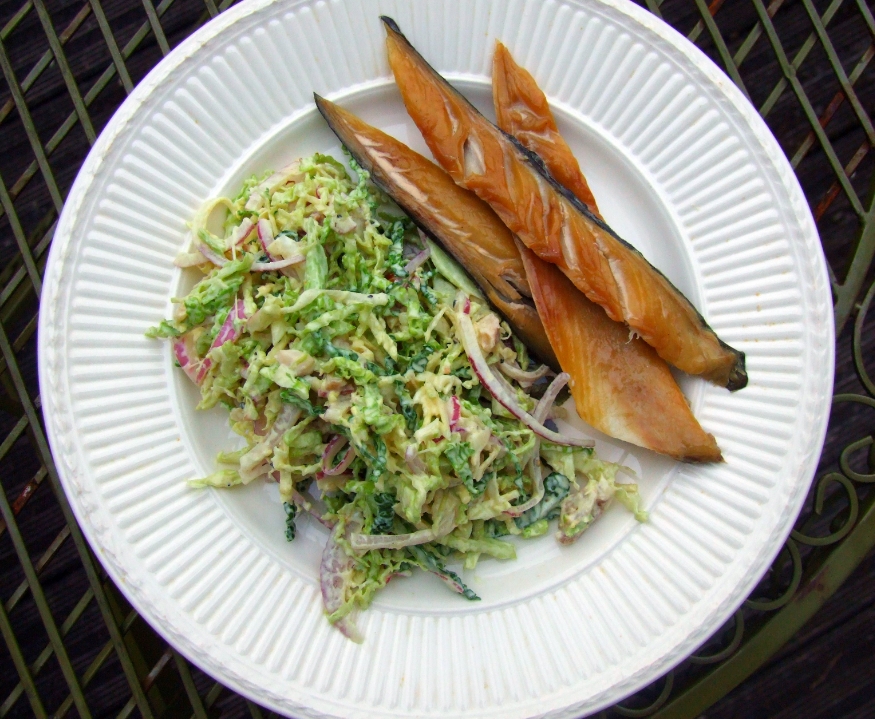
The crinkled heart of a young savoy is delicious freshened up with a dressing of yoghurt, mustard and lemon; raw brassica never tasted so good. This may be down to the addition of grilled pork and its fat.

I like this with mackerel; a freshly grilled fillet is nice but to be honest, on a school night, a couple of smoked pieces from a packet is often all I can manage.

Savoy slaw with bacon and walnuts

1 savoy cabbage, tough outer leaves and core removed and finely shredded
1 small red onion, halved and cut into fine slices
200g Greek yoghurt
1 tablespoon wholegrain mustard
100g walnuts, toasted and roughly chopped (by ‘toast’ I mean put them in a dry pan on a low heat and shimmy them around until they start to smell fragrant. Take care not to burn them).
6 rashers streaky bacon
Pinch of caster sugar
Juice of half a lemon

Grill the bacon until crisp and then chop into small pieces.

Mix the shredded cabbage, onion, bacon and walnuts together in a large bowl. Mix the yoghurt, mustard, sugar and lemon juice together well then add to the cabbage mix and combine. Season with salt and pepper.