
Charred Sweetheart Cabbage with Prawns and a Pickle Brine Dressing
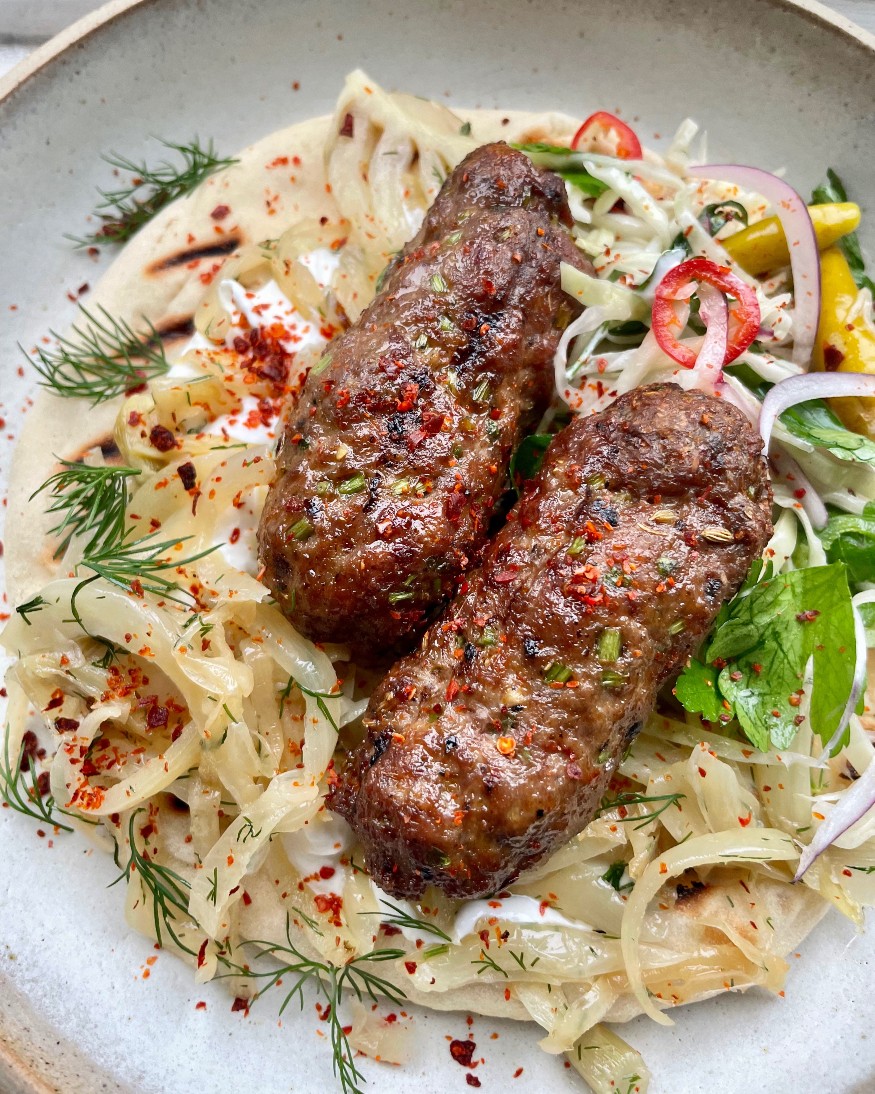
Lamb Kebabs with Fennel and Preserved Lemon Relish
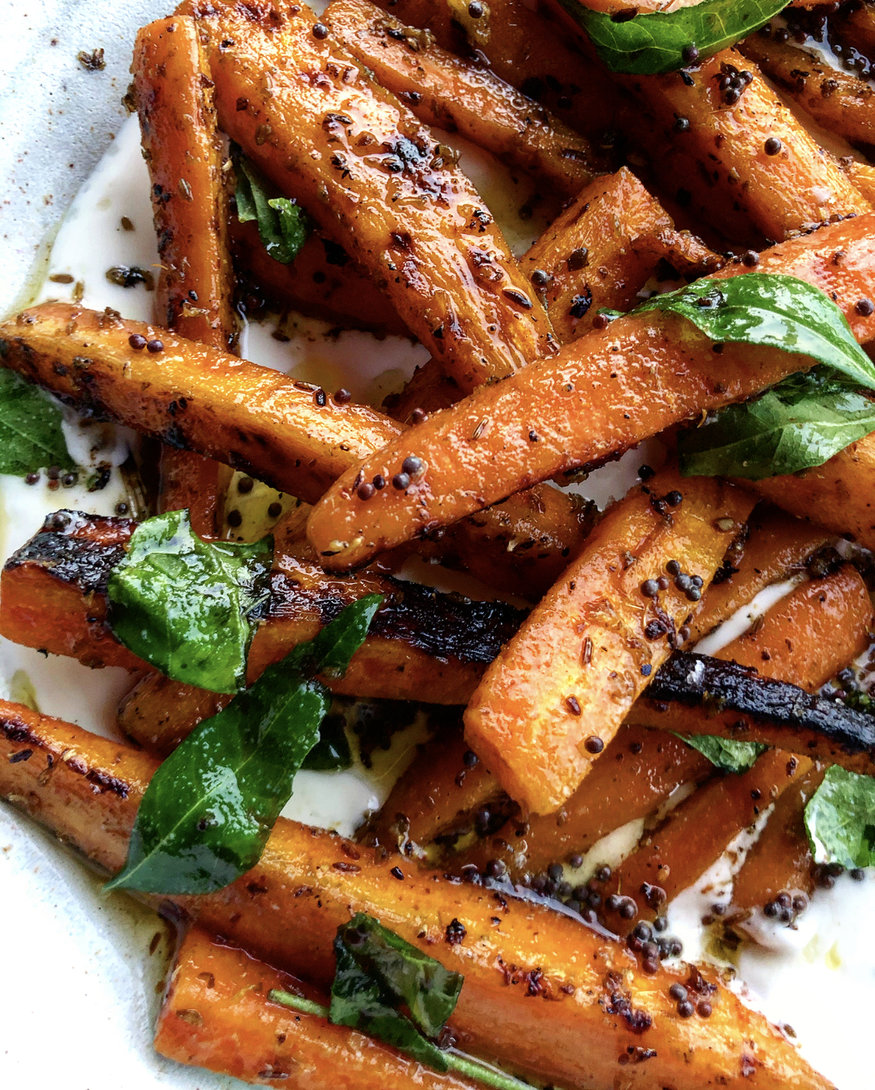
Grilled Marinated Carrots, Strained Yoghurt and Curry Leaves
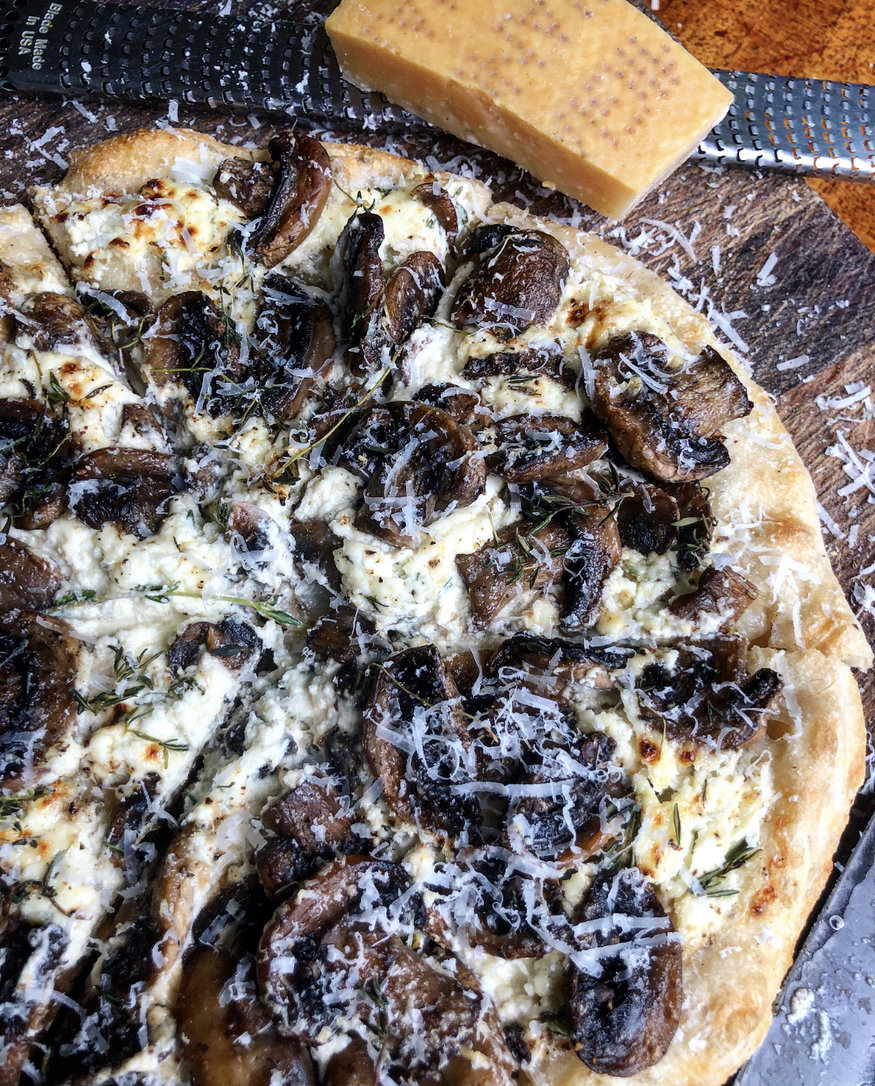
Frying Pan Pizza with Garlic Creme Fraiche, Mushrooms and Parmigiano Reggiano
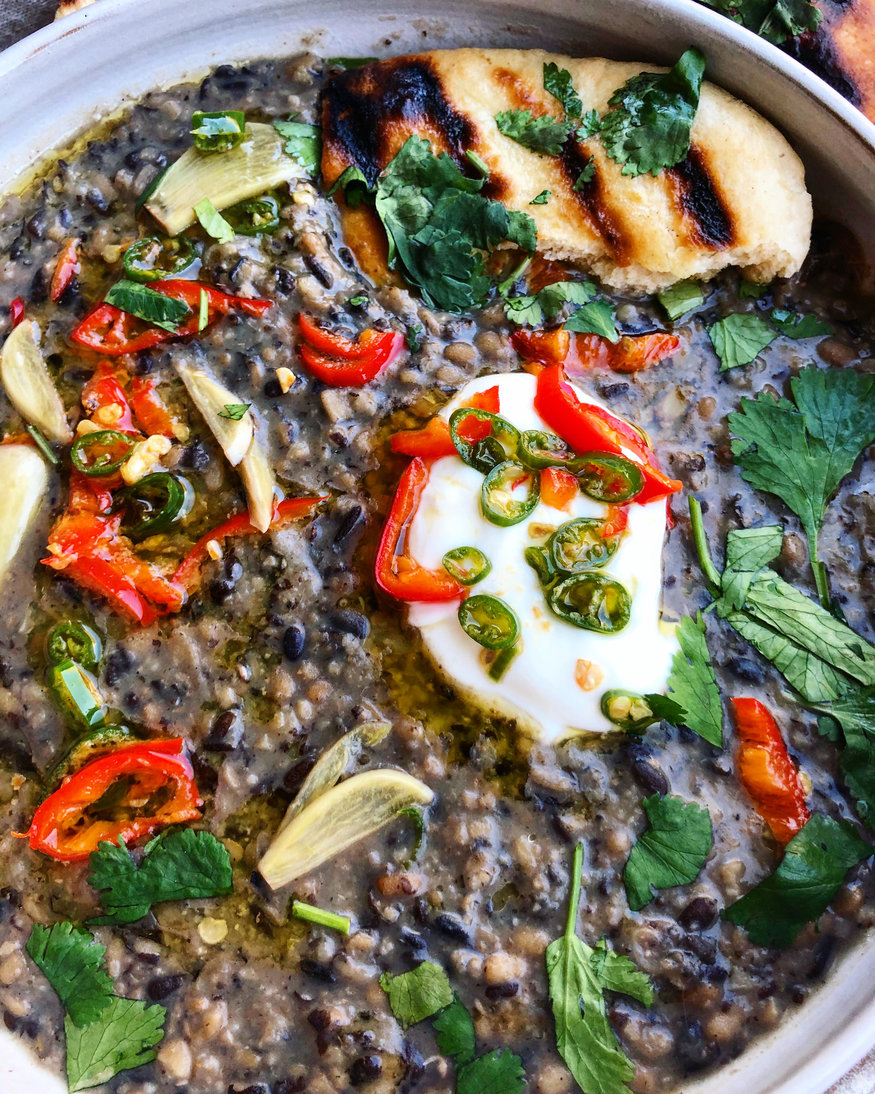
Smoky Aubergine and Black Lentil Dhal
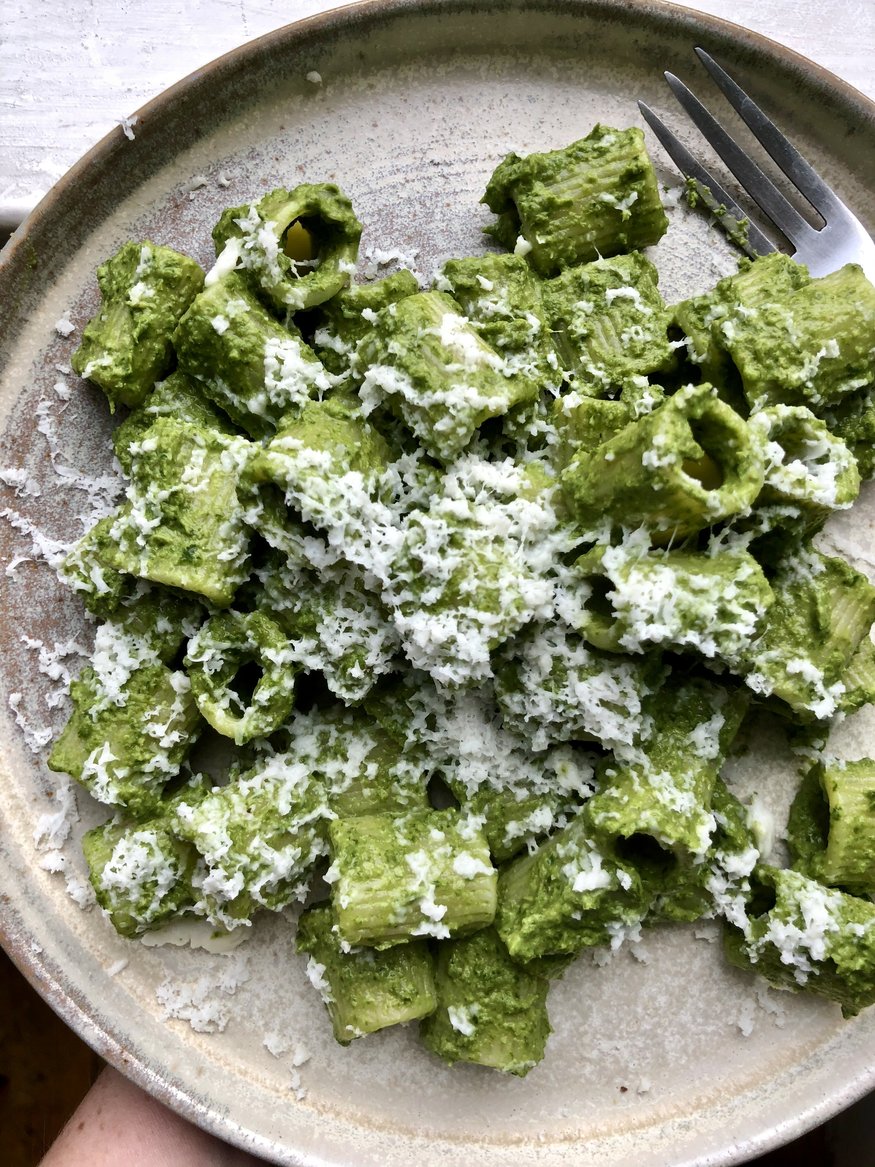
Rigatoni with Kale, Walnuts and Halloumi
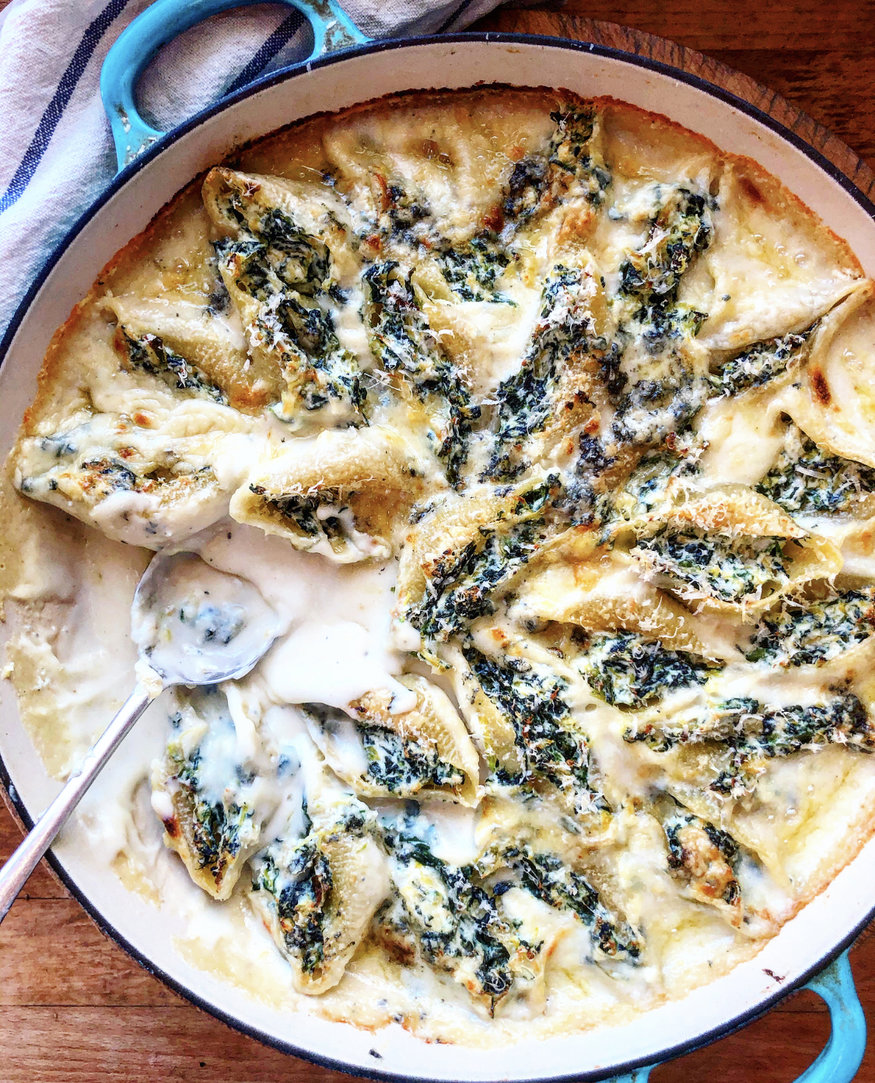
Super Cheesy Stuffed Pasta Shells
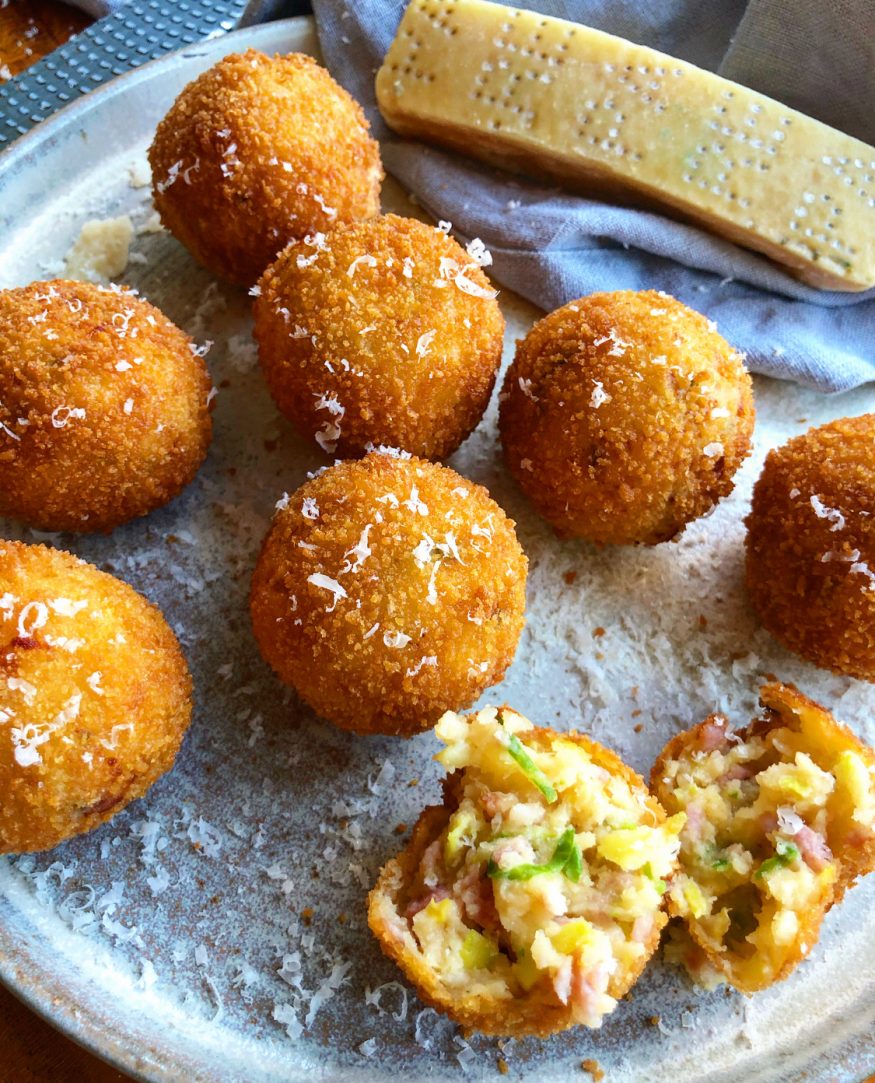
Parmesan, Bacon and Brussels Sprout Croquettes
Brussels Sprout Kimchi
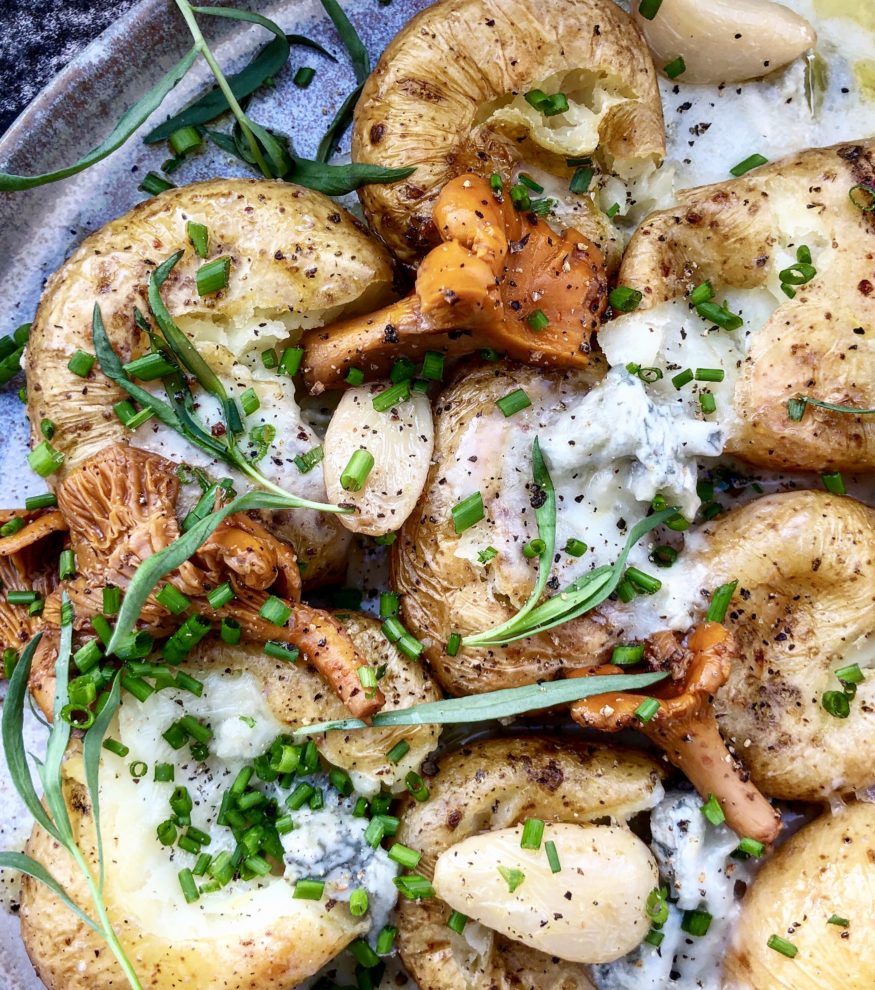
Fancy Baked Potatoes